Holding on to anger, resentments, hurt and pain rather than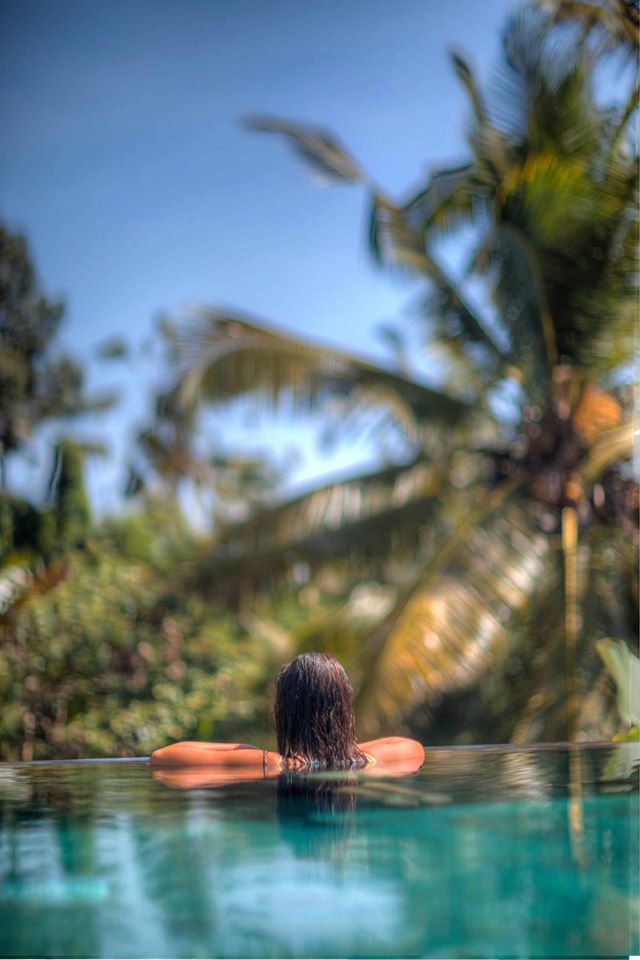 forgiving is something that is very detrimental to our health.
When we can resolve major issues like power, control,
abandonment, jealousy, and anger issues the sooner we can move out of the drama and into a really creative, productive and exciting life in which we are truly growing!
When we overeat eat cooked foods, processed foods, junk foods, packaged foods loaded with chemicals, over-salty & over-flavoured foods, or we overeat then our colon is stressed. And when our colon is stressed, we are stressed. And then it’s much harder to be kind, positive, loving or forgiving.
We are so addicted to foods that harm us. And so it is easy to get addicted to addictive negative
emotions that harm us too.
And just as much it’s easy to get addicted to anger, hate, confusion, sadness, despair. Powerful emotions generating powerful addictive chemicals in our body.
But when we eat a raw diet, it’s possible to break the cycle. Diet and emotions work together in so many ways. And interesting that eating a diet which is not addictive in any way, we become free of addictions. We think more clearly. We aren’t so easily stressed.
This is what we focus on our retreats. We do a week of raw food, eating our way into health one bite at a time. We workout and bring play back into our life. And we do our inner work. And together these planes support each-other to generate a huge forward momentum that we are truly shift into a whole new way of life and a whole new level of vibrancy!
We offer personalised retreats to support you in any transition; a holiday just for you. Please see our personalised page for all the details.
The science of Mudras is a big part of yoga and is based on the fundamental principles of life and the five elements of Fire, Air, Ether, Earth and Water corresponding with each finger of the hand.
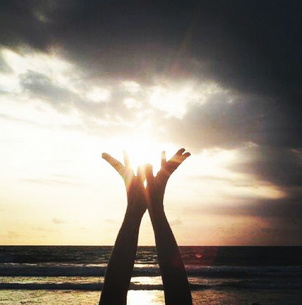
They are mainly performed as gestures by fingers, hand positions combined with yoga postures or are performed on their own. They are also often done during meditation.
Mudras also known as energy controls hold electromagnetic power which is said once held maintains equilibrium in the body elements.
There are even prescriptions of holding particular mudras for set periods of time for rejuvenating the body, healing diseases and to also help with focus. A mudra for any ailment!
The Yoga Synergy sequences incorporate them within their system and is a great opportunity to experience their effects whilst practicing yoga.
For the purpose of these next few posts we will keep the focus on particular hand mudras and later expand into generating mudras within postures.
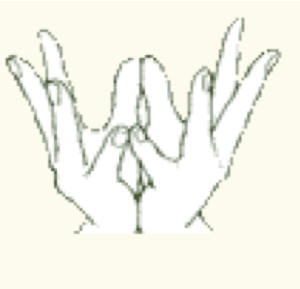
PANKAJ MUDRA or also known as the Lotus Mudra
Is a symbol of purity and offering, and a part of worship.
In this mudra both the thumbs and little fingers touch each other.
This mudra is said to develop the fire and water elements as well as balancing them out.
‘Like a lotus, which remains detached from the mud in which it blooms, a practitioner remains detached from the mud of attachment, while continuing their meditation.’
This mudra has a cooling effect on the body, the nervous system improves and the mind becomes calms. It’s said to be a great pacifier for fevers and to work well with blood disorders.
For me I feel like my whole mood lightens up when I make this gesture it makes me want to smile. Try it out for yourself and leave a comment below!
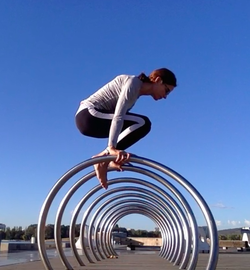 One thing I don’t want to use to help me with my handstands is the wall. That means I need to look for a few other interesting variations.
A few weeks ago I popped up a post of us practicing yoga on top of some blocks. That helped my skinny arms and tummy get strong.
Then I looked over from the blocks. These bike racks hang out near where I hang out and so I thought I would see if there was a way for us to hang out together.
I tried a few push variations with me on top and pushing down with my armpits to bring my knees to chest. Then I realised I was finding a lot of things to push on but was there a way to get some pull action going on.
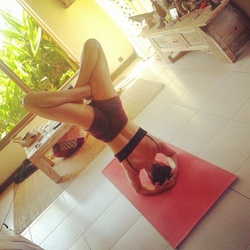
It lead to the upside down variation of shoulderstand, which I have called a flying shoulderstand, and you can check it out in the video below.
This gave great pull action around the armpits and also I tried to minimise momentum and use my tummy muscles to help me move around and into and out of the posture. I am actually pretty weak so you can see a little swing here and there.
This would be better if I were higher off the ground so I could try and let my neck be a bit free.
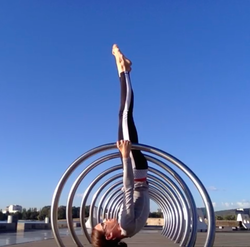
I did not want to put my head on the ground and I don’t recommend anyone even try what I am doing without some supervision. If you are not strong enough you would fall on the back of your neck and that is obviously not good so I am not advising go out and do this at all or unthinkingly. This is mainly for my students and safe practitioners.
Hmm, I wonder if we will find some bike racks in Bali for our retreat?
Happy and safe practicing!
Much metta,
Sonja
www.yogacafecanberra.blogspot.com
www.artofliferetreats.com
 As a teacher I am always trying to demonstrate active movement and show where movement may be coming from. Sometimes this is tricky because what you see may not be where the movement arises.
Also, sometimes a more passive posture may end up looking much the same as the active posture. But the feeling is completely different.
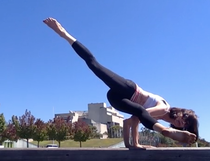
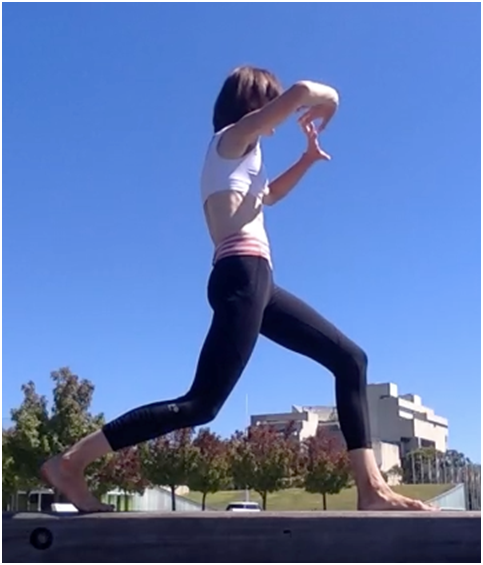
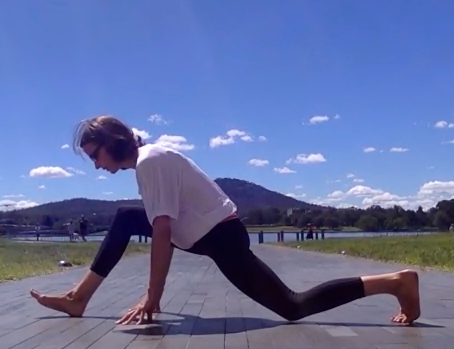
In the first picture I used active spinal movements to come into the pose.
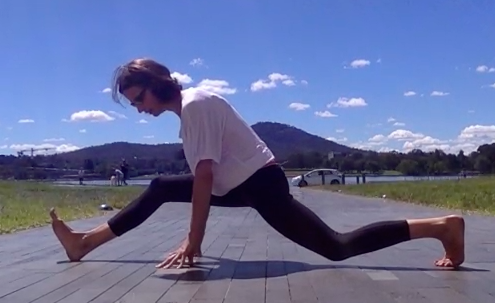
In the second I came in by ‘falling’ with gravity and mainly by flexing my hips.
While they look much the same, the feeling in the torso especially is completely different.
Active movement (spinal forward flexion first) – Non-active movement (hip flexion first)

I don’t want to suggest one is right or wrong. I choose to do the first version in my practice and teaching to help develop strength and mobility in the torso.
Aside from helping my spine feel good, moving actively and having activated muscles around my tummy in particular, helps me come into the arm balance variation that follows this posture in our current sequence.
Here I have to say, I got a six-pack without ever doing a crunch or by adding a ‘core yoga’ section into my classes or self-practice.
I simply do active movements throughout my entire class and am pretty much doing a ‘sit-up’, aka active spinal forward flexion, in every forward bend I do.
Back to the postures at hand! There are two. A standing posture, then an arm balance.
Watch the video first to get a sense of the flow and process.
|
|
|
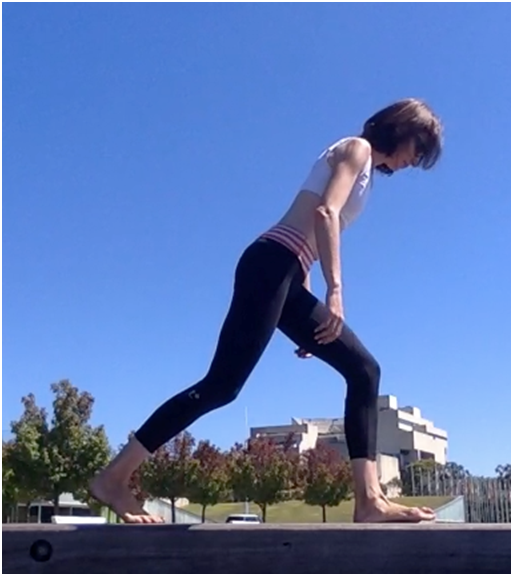
Spinally speaking, the standing posture is basically a twisting, side bending, forward bending backbend. That is, once I am in the lunge and lengthen lower back (sitting bones down, top of pelvis back), I do a twist, a side bend, a forward bend, then a little back bend in my upper back. A little hip flexion creeps in but after the spinal forward flexion.
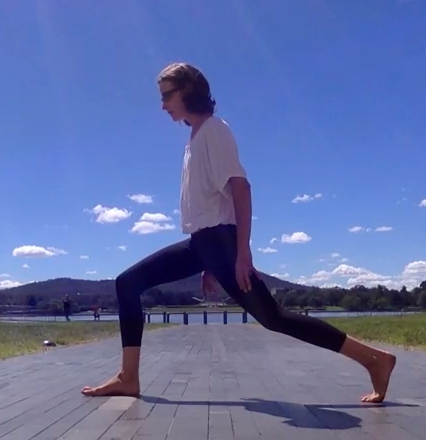
Step 1: Get into a lunge
In this lunge I have my back heel up. That is because I am going to make this posture dynamic and move into the arm balance. Traditionally heel is down.
Many people find having heel up difficult to balance. You need to be using your feet and legs actively to assist with the balance. I grip with my toes lightly.
Also, if you allow your hips to be sinking it is often a sign you are not using your legs actively enough and will make it harder to balance. I keep my hips a little higher and legs active here. Nothing wrong with going lower but just in an active and not sinking way.
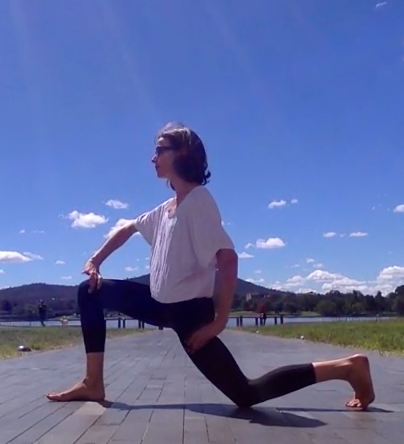
Step 2: Lengthen lower back
Here I have taken sitting bones down, top of pelvis back in order to lengthen my lower back.
To me, this is different and more subtle than ‘tucking under’. Remember, rather than fret about action, go for feeling. The feeling here is to have space in your lower back and not squashing.
In this picture I have also lengthened my entire spine. I have taken my lower ribs back and up lightly. You cannot see my neck but I have head down, neck back slightly to lengthen back of neck.
I have begun to push my armpits forward and lightly down, elbows lightly up.
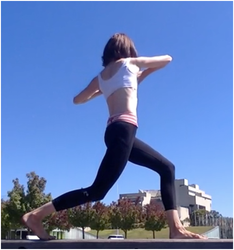
Step 3: Active spinal twist
I try to move from base of spine upwards. That means, turning from navel, area then lower ribs, then chest, then shoulders.
Look at the front foot. See how much it is still working.
Spine still long, not arching.
Step 4: Active spinal side bending
Here I initiate side bending by bringing back hip forward and up towards the rib. At the same time I am reaching opposite arm up and forward from my waist/pelvis and trying to move that side hip back slightly so the whole side body lengthens.
The side of my body that closest in this picture is firming. This side bending firmness will help me in the arm balance.
You can see I start to have more weight on my front foot—the back heel is raising as well in preparation for the arm balance to soon come.
At this stage I am in a back lengthening, twisting, side bending posture.
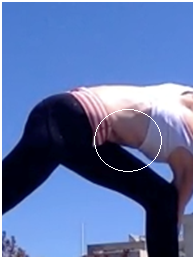
Step 5: Spinal forward flexion
Now I have begun a spinal forward flexion process.
See the space you can see between the top of my thigh and torso and how the angle is still relatively open.
I am now in a spine lengthening, twisting, side bending, forward bend.

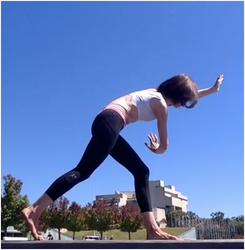


There is no need to go deeper. Unless you are coming to the arm balance, that is!
To get to the ground I need some hip flexion. I initiate hip flexion here, after I have done my active twisting, side bending, forward bend. Importantly, I maintain these actions as I lower.In my own practice I often choose to stay at this point here. It feels really good.
I can do the arm balance easily but for me it seems unnecessary compared to how nice it feels to stay actively in this posture for some time.
At this point a t lot of yoga teachers in classes I have attended will come up and try and get me to put my back heel on the ground, to try and put my hand on the ground, to try and take my legs further apart.
There is nothing wrong with that. But this feels so much better. Perhaps it is not pretty but once you start to appreciate active movements and see what is going on in the posture you see this as something lovely and delicious feeling.
I am not leaning or using the bottom arm on my knee at all. If you were to use it then do so in an intelligent and active way. That would mean using the arm to press lightly into the thigh and pressing the thigh back into the arm. I am definitely not using my arm to ‘wrench’ or twist my spine here. I am also not sinking into it.
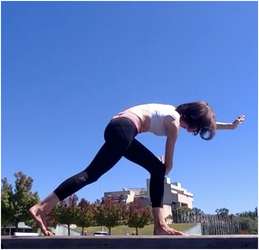
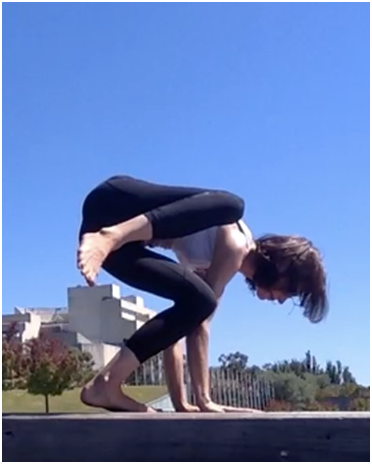
Step 7: More hip flexion and knee bending to get hands to ground
The only way to get to the ground is to get some more hip flexion in there, front knee bends more as well.
A lot more in fact. You can see it has started to come in front of my toes. I need to be firm behind my knee to maintain the integrity of my knee here. My ankles are moderately flexible in a squat so my heel can stay down. If you need it is perfectly fine to lift that heel. In fact, it might help you to keep firm behind the knee.
You can see hands are coming in front of the foot and off to the side.
I am maintaining all of the actions from previous steps. That means my front knee is actually only lightly touching my arm.
Notice how at no stage did I start pushing my arm into the knee to get me into this twist. They are touching lightly here. I do not want that front knee to get heavy. It will become heavy if you are not using your torso actively and you will feel like you are sinking in this posture instead of lifting.
This picture sort of shows you how my whole back body is lengthened, not flattened. You can see I am moving my chest into my upper back and moving my shoulder blades around the sides of my chest.
Notice I am transferring weight forward. You can see this as I am coming more onto the tops of my toes on the back foot.
Step 8: Enhance side bending
Leaning forward with more weight on my hands and pushing the floor away. I don’t want weight on my feet in an arm balance. I need to support it by pushing into the floor with arms to get lift.
I am gripping with finger tips as thought grabbing at the ground (not flattening fingers).
I am maintaining all the core actions.
This allows me to enhace side bending by bringing the back knee into my shoulder. I can only do this without feeling heavy or sinking if I have kept all of the actions in the torso.
You can see weight is more and more over the hands and my front heel has started to lift. I need lightness in this foot to come up.
I squeeze my wrists together and keep feeling as though my elbows are trying to come together.
Step 9: Lean forward, smile, stay firm but calm, and lift
Compare this picture with the previous one and you see my shoulders have come further forward over the finger tips. I have to lean forward without dropping into my shoulders to come into this position.
Actually, let me correct myself. I don’t have to. You can drop and do this but it will probably feel awful on your wrists and shoulders!
If you can sneak a look at my tummy here you can see is it active!
Step 10
Step 10: Legs out!
I continue leaning forward. See how far my shoulders have come in front of wrists. I suppose if you were stronger you would not need to lean as far forward but I am not that strong. I am trying not to lower my chest but to stay lifted.
Maintaining all previous actions, I just straighten my legs.
The top thigh is rolling in and bottom thigh is rolling out.
I am happy and calm and firm and strong and feeling good. If you walked past me I could say hello and tell you how good I was feeling and have a little chat without getting breathless.
In Sum
Remember that this arm balance is just a bit of show ponying really. It looks impressive but it won’t make you happier or healthier!
Staying in the standing version might help you more than the arm balance.
.
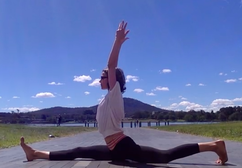
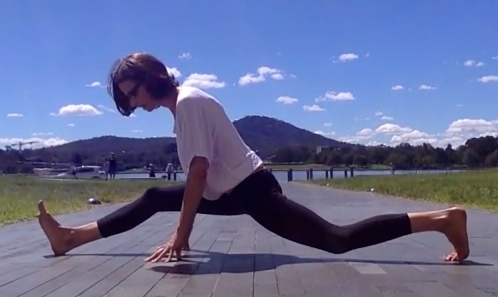
I proceeded to do the splits right there and then, with no preparation.
Well, let’s say I managed the position but did something to my butt that had me limping for a month!
These days I can do the pose almost first thing in the morning as I have been practicing for many years. However, most people will need quite a bit of preparation.
The splits should not feel like too much stretching. It is not about splitting apart.
Working actively means the pose is actually about coming together again.
You remain at whatever stage you feel comfortable in (feel like lengthening and relaxing, not stretching and tugging). But first, some keys to practice. Below I have shown step-wise progression into the posture.
Hover the curser over the photos to see the steps

There are two key things I am doing in each stage. The first also has a little subplot.
The back thigh is rolling in, which means you might feel the inner thigh firming a little. If you could turn around and see your knee is trying to move so it is more towards the centre line of your body.
The subplot here is that I am also trying to move the side of front hip back and draw side of back hip forward.
If you are not mindful the opposite tends to happen. That is, when you roll the front thigh out it can often bring the side of front hip forward and when rolling the back thigh in it can often send the side of back hip backward. So you need to watch out for this.
The second key thing I am doing is to try to suck my legs or feet together.
Yes. I am not actually trying to split them apart.
Sucking them together could be likened to someone at foot trying to push your legs back together (what I am doing).
Whereas most beginners just try to let their legs come apart. Actually, they do not even do that so much as let the weight of their entire pelvis and torso just hang and sag in the middle. Its not a pleasant feeling. Sucking it up is key.
In our yoga practice of this pose we need to be thinking of trying to draw our feet back together again (while they move apart).
This makes the posture active rather than passive.
It will help make you stronger and more mobile.
The video shows these movements in action. I have also provided a 2nd video to show advanced variations of the posture (intended for demonstrational purposes).
|
|
|
The bare naked sky above you is good for you. That ceiling and those walls just contain you.
The breeze on your face is good for you. That air conditioning (or heating) just dries you out.
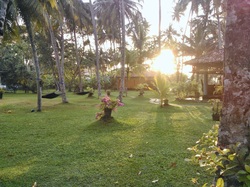
The ground beneath your feet–be it grass or dirt or sand is good for you. Wooden floors are nice, don’t get me wrong, but they are inside!!
When you practice outside beneath an open blue sky you look up and feel almost as though you are a part of it. It’s breath-taking.
When you open your eyes from savasana to behold a starry night you can’t help but feel at peace.
It’s awe inspiring.
When you start your pre-dawn practice and watch the sun rise, you feel the sun’s rays shimmering on your skin.
It’s radiant.
When you practice in nature you are continually amazed by the beauty of the world around you.
No matter what wallpaper is pasted, what music is played, or what statues are placed, I will never find a better place to practice than the great outdoors.
On days when I feel exhausted, I always feel better if I just open a window or door.
On days when I think I can’t practice, I simply step outside and find myself drawn to move or sit quietly and meditate.
It might be freezing, it might be boiling. It might be windy, it might be raining.
I simply pop my head outside and figure out what I need to wear and where I can be as sheltered as necessary without ‘succumbing’ to the elements.
It can be hard. Sometimes you need to be creative. But it is always worth it.
One of the main elements on our retreats is to get connected to mother nature. To be inspired and supported by the simple things in life.
Why don’t you try for yourself? Expose yourself to the outdoors and feel yourself embraced by nature.
www.yogacafecanberra.blogpost.com
www.artofliferetreats.com
 In most Asian countries people sit on the floor for most of their daily tasks. All their meals and socialising as well as their general work is still done mainly on the ground. This means that their hips are open and their spines are able to move independently from their hips, this also requires having great strength in the legs and core to be able to get up and down from such high distances with ease, hence Padmasana is a basic pose for many Asian people.
All these elements are really important to able to get into a seated lotus position. In the West our chair-culture has prevented us from developing these movements and openings. So when we start to practice yoga, just sitting on the floor is our biggest practice.
Moving the spine in different leg positions allows the softening to happen. The ideal way to get into any pose is to move into it without any assistance. By focusing on active movements we develop the muscle intelligence without having to force any joint into a position that might not be ready. In Padmasana so much care needs to be taken around the knee area, but both the hip and ankle joints can also be compromised if these areas are also too stiff.
Just like we cross our arms easily, our legs should be able to move just as gracefully. One of the easier ways to practice lotus is in a headstand where gravity works in our favour. But to do this, first our headstand needs to be proficient so do take care.
So in your normal practice focus on active movements with the usual standing hip opening poses (forward bends, lunges, trikonasana variations, warrior variations, gadjastan variations) as well as moving actively (no hands) into sitting poses.
Make sure to actively externally rotate the hip that should be externally rotated in those postures. Also make sure to remain active in the pose so as not to not sink into hips. Use principles of activating muscles while in lengthened positions.
We can see how a more natural bodied person, Ramali can come into a pose like Padmasana (lotus) with ease and without hands.
Ramali takes her legs into position in two very smooth movements. This is what we are looking for in our practice.While Sonja can do this first thing in the morning, with no preceding warm ups or movements, as we can see in the video she still has a slight ‘sawing’ action to get there. It’s all a practice.
This article was not written to dishearten. But for us to think about the truth and reality of what our body is able to do of its own accord.
Based on ideas of active movements and trying not to force your body into position we encourage students to try to move their legs into postures using just their legs. This brings much more body awareness ~ play around with it when you are next on the mat!
Happy and safe practicing.
Oksana
Join us on our upcoming retreat
www.yogacafecanberra.blogspot.com
“Take all you can eat but eat all you take.”
At first glance, this might seem like a sure-fire way to obesity. The sort of instruction that tells you to eat everything on your plate and don’t even think about leaving the dinner table until you have!
However, it was not.
Dad was very mindful of waste. He grew up in a time where you were lucky to have a pair of shoes to walk to school in and, despite limited travel opportunities, knew enough about the world to understand there were plenty of people who were lucky to get one meal a day, let alone three.
So Dad’s advice was about being mindful and appreciative of what you had. He would always tell us we could go back for more if we were really hungry but perhaps put only the amount of food on your plate that you are sure you can eat. At the same time he would remind us that sometimes your eyes can be bigger than your stomach so perhaps take a little and then wait and see if you need more.
Having lived in countries like Bangladesh, India, and Sri Lanka I have seen for myself how some families throw out more food after one meal than other families get to eat in a day and I always think of my Dad’s advice when I see food bins overflowing with ‘scraps’.
This piece of Dad advice is very much in line with common sense ideas about listening to what your body really needs, which many of us who have always enjoyed plenty, can easily forget.
Number 2 Way To Beat Overindulgence: Or When it is Ok to have Mars Bars for Breakfast Dad also gave us Mars Bars for breakfast on weekends before our athletics meets. To this I think most kids would go hooray and most parents would probably raise their eyebrows. But Dad was always about activity. His approach to eating was very much about balancing input with output. He knew that after eating that Mars Bar we would spend 3 hours out in the sun running around competing in 1500m runs, sprints, long jumps, shot puts, and all of the handstand competitions that went on in between events.
You might think Dad was all about junk but that is not true. He was thinking about nutrients based on the information he had at the time, combined with how much energy we would need and giving us something to eat that would not make us feel full and sluggish.
Dad was not just handing us rubbish. You see, Dad also made our sandwiches with multi-grain and wholemeal bread back before they were popularised telling us that eating white bread was like eating fresh air (i.e., basically nutrient poor). Anyway, his approach to food was that you needed to balance intake with output, consider whether what you ate would give you the energy you needed to do what you wanted.
On days where we weren’t doing much you can bet we were not being offered chocolates, although this was a rare day indeed as Dad would always have us engaged in something fun and active.
Actually, Dad was unknowingly following the only diet ever known to actually work in the long-term, which is to balance what you eat with what you do.
So, this piece of Dad advice is extremely important: “Eat to live don’t live to eat.”
While those are not Dad’s words, they are what he modeled and still models to this day. If you don’t do very much, then don’t eat very much. If you are doing a lot, then eat so you can do the things you need to do. In this regard, our Christmas Day with Dad always started with a family bike ride so that we might feel hungry enough for Christmas lunch rather than eat the food because it was there.
Number 3 Way To Beat Overindulgence: Don’t Pop Your Buckle This last piece of advice is actually what Dad’s Dad used to say. Or, at least Dad always quotes Grandfather when he says it.
“Always leave the dinner table feeling that you could eat a little more.”
This is excellent advice and stops you feeling like a python when you get up from the Christmas dinner table.
This is related to both the first and second pieces of advice. It is about eating what you need, and about ensuring whatever you eat does not prevent you from doing the things you want to or need to do.
The idea of eating so much that you could not go out and play with the kids or fix the car or tinker around in the shed was/is abhorrent to Dad who, to this day, will make sure he gets up to ‘unblob’ himself (as he puts it) if he has had a big lunch that is putting him to sleep.
In Sum Dad’s advice comes from a person who was physically active, and who appreciated that your body needs to work and move well so you can participate in a variety of daily activities. Dad was a runner and did not practice physical yoga. He does not have much idea of yoga beyond the knowledge that it is something I go and teach and do and which seems to be associated with me spontaneously doing handstands in the driveway or hanging from the beams of his verandah. However, to me his advice is very much in tune with ideas about respecting the interrelationship between body and mind and community that I have read in yogic texts and have learned from my teachers. Thanks Dad!
Merry Christmas to all. Happy and safe practicing.
- Arms Balances
- Balanced Eating
- Bali Retreats
- Blog
- Cacao
- Chlorella
- Coffee
- Community
- Core
- Deconstructing Yoga
- Detox
- Detoxing
- Farmers Market
- Farming
- Flying High Yoga
- Gardening
- Hanumanasana
- Healing Crisis
- Karma Yoga
- Living Food
- Lotus
- Mediation
- Menu Planning
- Moods
- Moringa
- Nature
- Organic
- Outdoor Practice
- Overindulgence
- Padmasana
- Paul Lowe
- Pranic Healing
- Raw Bread
- Raw Chocolate
- Raw Food
- Raw Food Testimonial
- Raw Italy
- Raw Transition
- Recipes
- Rwa Food Testimonial
- Shoulderstand
- Silence
- Slow Food
- Sonja Eberhard
- Spinal Movements
- Splits
- Spring Clean
- Stress
- Testmonials
- Uncategorized
- Wellbeing
- Yoga
- Yoga Retreats
- Yoga Synergy
- February 2021
- September 2020
- July 2020
- January 2020
- September 2019
- November 2017
- October 2017
- November 2016
- October 2016
- September 2016
- August 2016
- July 2016
- March 2016
- February 2016
- January 2016
- November 2015
- October 2015
- September 2015
- August 2015
- July 2015
- June 2015
- March 2015
- February 2015
- January 2015
- December 2014
- November 2014
- July 2014
- June 2014
- October 2013

Our aim is to explore the art of living through healing programs that offer nutritional raw food guidance and the chance to enjoy a personalized wellness program, as well as cultural experience with yoga, meditation, breathing techniques, healing workshops, restorative practices, and much more. Keeping in mind the benefits that yoga endeavors, daily morning yoga sessions are held for practitioners of all levels. Indeed, it is one of the top yoga retreats in Bali for newbie’s that offers raw vegan cooking workshops, pampering spa treatment, daily meals with desserts, and a visit to the special holy water temple that tourists don’t get to see. Your warming stay will be either at a contemporary tropical bungalow named Batu Umpug or at a 37-room boutique wellness hotel called Alaya Resort Jembawan. <img class=”alignright wp-image-1800″ src=”https://www.artofliferetreats.com/wp-content/uploads/2019/09/trees.png” alt=”” width=”654″ height=”442″ data-mce-src=”https://www.artofliferetreats.com/wp-content/uploads/2019/09/trees.png” />
Categories
Archives
Our aim is to explore the art of living through healing programs that offer nutritional raw food guidance and the chance to enjoy a personalized wellness program, as well as cultural experience with yoga, meditation, breathing techniques, healing workshops, restorative practices, and much more. Keeping in mind the benefits that yoga endeavors, daily morning yoga sessions are held for practitioners of all levels. Indeed, it is one of the top yoga retreats in Bali for newbie’s that offers raw vegan cooking workshops, pampering spa treatment, daily meals with desserts, and a visit to the special holy water temple that tourists don’t get to see. Your warming stay will be either at a contemporary tropical bungalow named Batu Umpug or at a 37-room boutique wellness hotel called Alaya Resort Jembawan. <img class=”alignright wp-image-1800″ src=”https://www.artofliferetreats.com/wp-content/uploads/2019/09/trees.png” alt=”” width=”654″ height=”442″ data-mce-src=”https://www.artofliferetreats.com/wp-content/uploads/2019/09/trees.png” />
