 One thing I don’t want to use to help me with my handstands is the wall. That means I need to look for a few other interesting variations.
A few weeks ago I popped up a post of us practicing yoga on top of some blocks. That helped my skinny arms and tummy get strong.
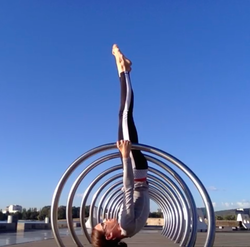
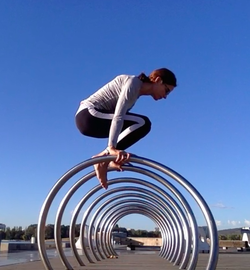
Then I looked over from the blocks. These bike racks hang out near where I hang out and so I thought I would see if there was a way for us to hang out together.
I tried a few push variations with me on top and pushing down with my armpits to bring my knees to chest. Then I realised I was finding a lot of things to push on but was there a way to get some pull action going on.
It lead to the upside down variation of shoulderstand, which I have called a flying shoulderstand, and you can check it out in the video below.
This gave great pull action around the armpits and also I tried to minimise momentum and use my tummy muscles to help me move around and into and out of the posture. I am actually pretty weak so you can see a little swing here and there.
This would be better if I were higher off the ground so I could try and let my neck be a bit free.
I did not want to put my head on the ground and I don’t recommend anyone even try what I am doing without some supervision. If you are not strong enough you would fall on the back of your neck and that is obviously not good so I am not advising go out and do this at all or unthinkingly. This is mainly for my students and safe practitioners.
Hmm, I wonder if we will find some bike racks in Bali for our retreat?
Happy and safe practicing!
Much metta,
Sonja
www.yogacafecanberra.blogspot.com
www.artofliferetreats.com
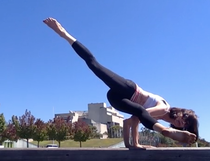 As a teacher I am always trying to demonstrate active movement and show where movement may be coming from. Sometimes this is tricky because what you see may not be where the movement arises.
Also, sometimes a more passive posture may end up looking much the same as the active posture. But the feeling is completely different.
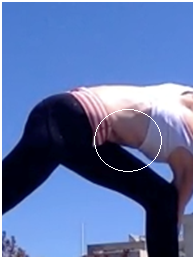
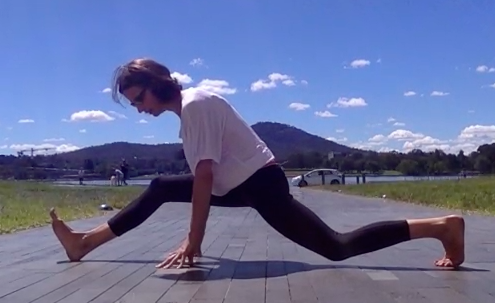
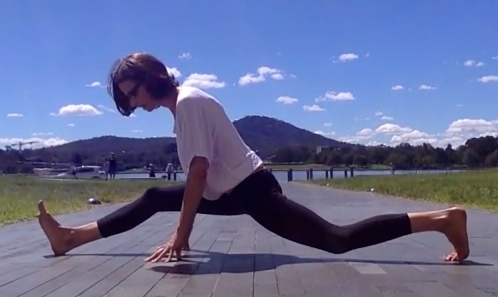
In the first picture I used active spinal movements to come into the pose.
In the second I came in by ‘falling’ with gravity and mainly by flexing my hips.
While they look much the same, the feeling in the torso especially is completely different.
Active movement (spinal forward flexion first) – Non-active movement (hip flexion first)
I don’t want to suggest one is right or wrong. I choose to do the first version in my practice and teaching to help develop strength and mobility in the torso.
Aside from helping my spine feel good, moving actively and having activated muscles around my tummy in particular, helps me come into the arm balance variation that follows this posture in our current sequence.
Here I have to say, I got a six-pack without ever doing a crunch or by adding a ‘core yoga’ section into my classes or self-practice.
I simply do active movements throughout my entire class and am pretty much doing a ‘sit-up’, aka active spinal forward flexion, in every forward bend I do.
Back to the postures at hand! There are two. A standing posture, then an arm balance.
Watch the video first to get a sense of the flow and process.
|
|
|
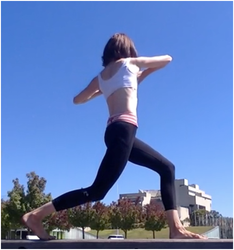
Spinally speaking, the standing posture is basically a twisting, side bending, forward bending backbend. That is, once I am in the lunge and lengthen lower back (sitting bones down, top of pelvis back), I do a twist, a side bend, a forward bend, then a little back bend in my upper back. A little hip flexion creeps in but after the spinal forward flexion.
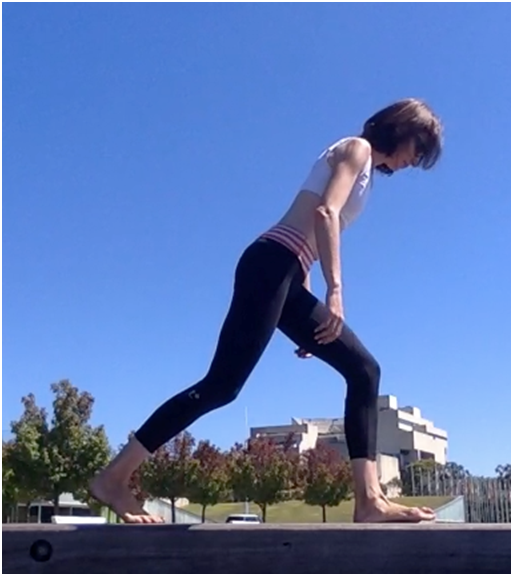
Step 1: Get into a lunge
In this lunge I have my back heel up. That is because I am going to make this posture dynamic and move into the arm balance. Traditionally heel is down.
Many people find having heel up difficult to balance. You need to be using your feet and legs actively to assist with the balance. I grip with my toes lightly.
Also, if you allow your hips to be sinking it is often a sign you are not using your legs actively enough and will make it harder to balance. I keep my hips a little higher and legs active here. Nothing wrong with going lower but just in an active and not sinking way.
Step 2: Lengthen lower back
Here I have taken sitting bones down, top of pelvis back in order to lengthen my lower back.
To me, this is different and more subtle than ‘tucking under’. Remember, rather than fret about action, go for feeling. The feeling here is to have space in your lower back and not squashing.
In this picture I have also lengthened my entire spine. I have taken my lower ribs back and up lightly. You cannot see my neck but I have head down, neck back slightly to lengthen back of neck.
I have begun to push my armpits forward and lightly down, elbows lightly up.
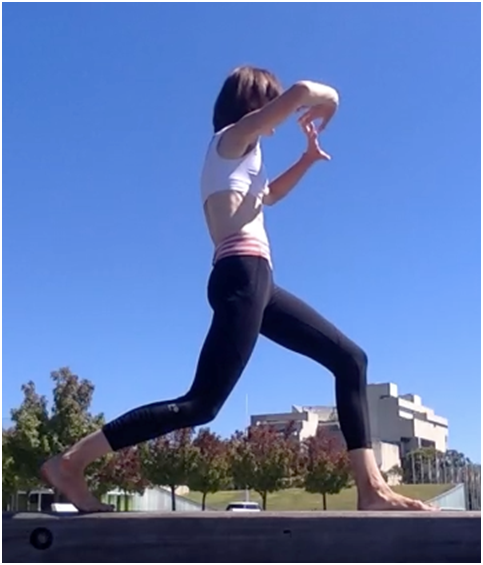
Step 3: Active spinal twist
I try to move from base of spine upwards. That means, turning from navel, area then lower ribs, then chest, then shoulders.
Look at the front foot. See how much it is still working.
Spine still long, not arching.
Step 4: Active spinal side bending
Here I initiate side bending by bringing back hip forward and up towards the rib. At the same time I am reaching opposite arm up and forward from my waist/pelvis and trying to move that side hip back slightly so the whole side body lengthens.
The side of my body that closest in this picture is firming. This side bending firmness will help me in the arm balance.
You can see I start to have more weight on my front foot—the back heel is raising as well in preparation for the arm balance to soon come.
At this stage I am in a back lengthening, twisting, side bending posture.
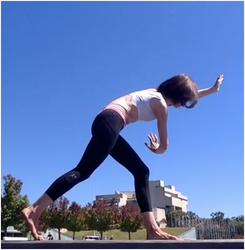
Step 5: Spinal forward flexion
Now I have begun a spinal forward flexion process.
See the space you can see between the top of my thigh and torso and how the angle is still relatively open.
I am now in a spine lengthening, twisting, side bending, forward bend.
There is no need to go deeper. Unless you are coming to the arm balance, that is!
To get to the ground I need some hip flexion. I initiate hip flexion here, after I have done my active twisting, side bending, forward bend. Importantly, I maintain these actions as I lower.In my own practice I often choose to stay at this point here. It feels really good.
I can do the arm balance easily but for me it seems unnecessary compared to how nice it feels to stay actively in this posture for some time.
At this point a t lot of yoga teachers in classes I have attended will come up and try and get me to put my back heel on the ground, to try and put my hand on the ground, to try and take my legs further apart.
There is nothing wrong with that. But this feels so much better. Perhaps it is not pretty but once you start to appreciate active movements and see what is going on in the posture you see this as something lovely and delicious feeling.
I am not leaning or using the bottom arm on my knee at all. If you were to use it then do so in an intelligent and active way. That would mean using the arm to press lightly into the thigh and pressing the thigh back into the arm. I am definitely not using my arm to ‘wrench’ or twist my spine here. I am also not sinking into it.
Step 7: More hip flexion and knee bending to get hands to ground
The only way to get to the ground is to get some more hip flexion in there, front knee bends more as well.
A lot more in fact. You can see it has started to come in front of my toes. I need to be firm behind my knee to maintain the integrity of my knee here. My ankles are moderately flexible in a squat so my heel can stay down. If you need it is perfectly fine to lift that heel. In fact, it might help you to keep firm behind the knee.
You can see hands are coming in front of the foot and off to the side.
I am maintaining all of the actions from previous steps. That means my front knee is actually only lightly touching my arm.
Notice how at no stage did I start pushing my arm into the knee to get me into this twist. They are touching lightly here. I do not want that front knee to get heavy. It will become heavy if you are not using your torso actively and you will feel like you are sinking in this posture instead of lifting.
This picture sort of shows you how my whole back body is lengthened, not flattened. You can see I am moving my chest into my upper back and moving my shoulder blades around the sides of my chest.
Notice I am transferring weight forward. You can see this as I am coming more onto the tops of my toes on the back foot.
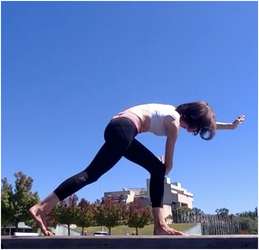
Step 8: Enhance side bending
Leaning forward with more weight on my hands and pushing the floor away. I don’t want weight on my feet in an arm balance. I need to support it by pushing into the floor with arms to get lift.
I am gripping with finger tips as thought grabbing at the ground (not flattening fingers).
I am maintaining all the core actions.
This allows me to enhace side bending by bringing the back knee into my shoulder. I can only do this without feeling heavy or sinking if I have kept all of the actions in the torso.
You can see weight is more and more over the hands and my front heel has started to lift. I need lightness in this foot to come up.
I squeeze my wrists together and keep feeling as though my elbows are trying to come together.
Step 9: Lean forward, smile, stay firm but calm, and lift
Compare this picture with the previous one and you see my shoulders have come further forward over the finger tips. I have to lean forward without dropping into my shoulders to come into this position.
Actually, let me correct myself. I don’t have to. You can drop and do this but it will probably feel awful on your wrists and shoulders!
If you can sneak a look at my tummy here you can see is it active!
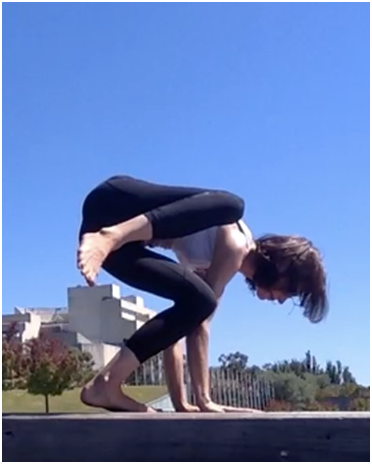
Step 10: Legs out!
I continue leaning forward. See how far my shoulders have come in front of wrists. I suppose if you were stronger you would not need to lean as far forward but I am not that strong. I am trying not to lower my chest but to stay lifted.
Maintaining all previous actions, I just straighten my legs.
The top thigh is rolling in and bottom thigh is rolling out.
I am happy and calm and firm and strong and feeling good. If you walked past me I could say hello and tell you how good I was feeling and have a little chat without getting breathless.
In Sum
Remember that this arm balance is just a bit of show ponying really. It looks impressive but it won’t make you happier or healthier!
Staying in the standing version might help you more than the arm balance.
.
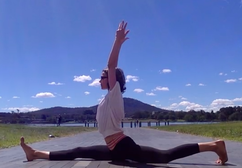
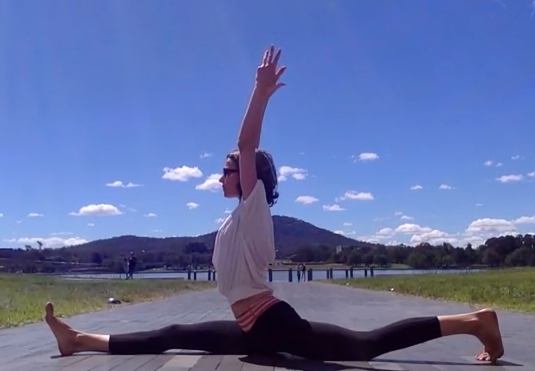
I proceeded to do the splits right there and then, with no preparation.
Well, let’s say I managed the position but did something to my butt that had me limping for a month!
These days I can do the pose almost first thing in the morning as I have been practicing for many years. However, most people will need quite a bit of preparation.
The splits should not feel like too much stretching. It is not about splitting apart.
Working actively means the pose is actually about coming together again.
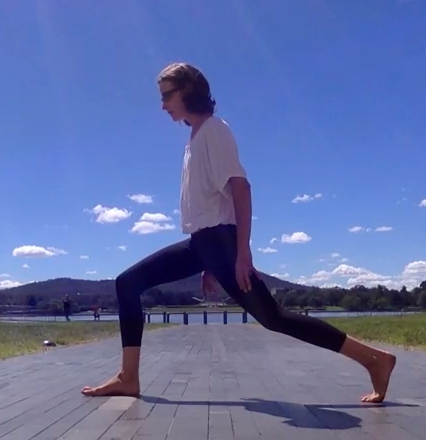
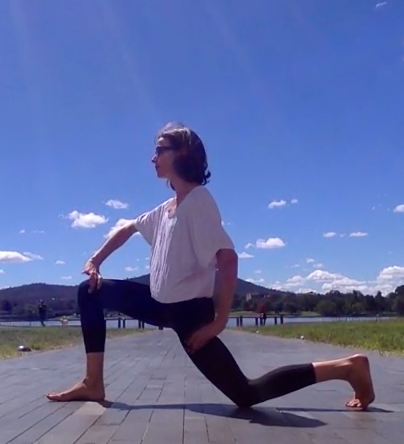
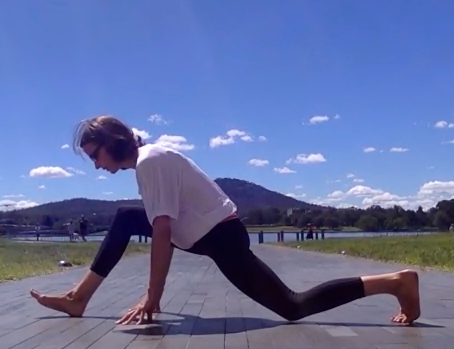
You remain at whatever stage you feel comfortable in (feel like lengthening and relaxing, not stretching and tugging). But first, some keys to practice. Below I have shown step-wise progression into the posture.
Hover the curser over the photos to see the steps
There are two key things I am doing in each stage. The first also has a little subplot.
The back thigh is rolling in, which means you might feel the inner thigh firming a little. If you could turn around and see your knee is trying to move so it is more towards the centre line of your body.
The subplot here is that I am also trying to move the side of front hip back and draw side of back hip forward.
If you are not mindful the opposite tends to happen. That is, when you roll the front thigh out it can often bring the side of front hip forward and when rolling the back thigh in it can often send the side of back hip backward. So you need to watch out for this.
The second key thing I am doing is to try to suck my legs or feet together.
Yes. I am not actually trying to split them apart.
Sucking them together could be likened to someone at foot trying to push your legs back together (what I am doing).
Whereas most beginners just try to let their legs come apart. Actually, they do not even do that so much as let the weight of their entire pelvis and torso just hang and sag in the middle. Its not a pleasant feeling. Sucking it up is key.
In our yoga practice of this pose we need to be thinking of trying to draw our feet back together again (while they move apart).
This makes the posture active rather than passive.
It will help make you stronger and more mobile.
The video shows these movements in action. I have also provided a 2nd video to show advanced variations of the posture (intended for demonstrational purposes).
|
|
|
I wasn’t sure about writing a detox blog this year because it seemed predictable, but something clicked inside of me and I wanted to write about how we can learn to listen more about our body and know when it is time to reboot or reset the button.
There are many reasons why people have the need to clean out the cobwebs. Here the main reasons:
overindulgence
chronic-stress
 fatigue
sluggishness
digestive problems (bloating,skin problems)
Results:
Gain more energy
increase vitality
refined senses
clear mind and focus
positivity
inspired and motivate
Realigning with our internal guidance system is the reason why I detox. I love the way my food-mind -body comes into balance. We need to learn how to listen to our body’s and know when it is time.
Here is a really simple plan.
1 big glass of warm water with Lemon or Apple cider vinegar upon rising.
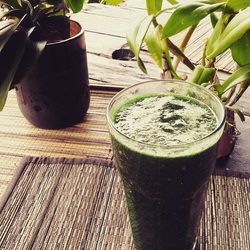
1/2 an hour later 1 smoothie
Ginger/Mint/Mango Smoothie
2 cups firmly packed Greens: spinach, kale, collard, purslane,
1/2 cup mint
1/2 lemon with rind for bioflavanoids
1/2 avocado
1 mango fresh or frozen
2 cups water
1 Tbs. spirulina, hemp powder, maca, optional
Blend in a high speed blender until smooth
Drink lots of water during the day
Coriander, Spinach Sweet Potato Soup
2 cups Spinach or Kale
1/2 cup coriander
1/2 avocado
1-2 Tbs. Coconut oil
1/2 sweet potato cubed
1 small nob tumeric fresh
2 cups water
Blend in a high speed blender and consume around 4 pm
Daily skin brushing – The skin is our biggest organ, by invigorating the whole body we allow the toxins to come out. It’s a really simple process to get the skin smooth and glowing, and also great for those stubborn cellulite areas too!
Sauna – infra-red saunas are the best, but any sauna will steam-clean you from the inside out. Make this a weekly habit for a month and just feel the difference.
Exercise – this means walking, yoga, swimming – get out and about as much as you can.
Meditation – Find a nice tranquil place and make this your special meditation spot. Just 15 minutes a day with the intention of being still and quiet will do wonders for you.
By making small changes to your routine you can experience great benefits. It doesn’t mean you have to go-hard or go-home, it doesn’t mean you need to restrict yourself and push yourself to the edge every time. Just a few simple additions to your daily life will bring a spring back to your step, and you never know perhaps they will become a regular part of your life.
Be happy, love life and shine!
The bare naked sky above you is good for you. That ceiling and those walls just contain you.
The breeze on your face is good for you. That air conditioning (or heating) just dries you out.
The ground beneath your feet–be it grass or dirt or sand is good for you. Wooden floors are nice, don’t get me wrong, but they are inside!!
When you practice outside beneath an open blue sky you look up and feel almost as though you are a part of it. It’s breath-taking.
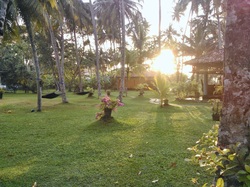
When you open your eyes from savasana to behold a starry night you can’t help but feel at peace.
It’s awe inspiring.
When you start your pre-dawn practice and watch the sun rise, you feel the sun’s rays shimmering on your skin.
It’s radiant.
When you practice in nature you are continually amazed by the beauty of the world around you.
No matter what wallpaper is pasted, what music is played, or what statues are placed, I will never find a better place to practice than the great outdoors.
On days when I feel exhausted, I always feel better if I just open a window or door.
On days when I think I can’t practice, I simply step outside and find myself drawn to move or sit quietly and meditate.
It might be freezing, it might be boiling. It might be windy, it might be raining.
I simply pop my head outside and figure out what I need to wear and where I can be as sheltered as necessary without ‘succumbing’ to the elements.
It can be hard. Sometimes you need to be creative. But it is always worth it.
One of the main elements on our retreats is to get connected to mother nature. To be inspired and supported by the simple things in life.
Why don’t you try for yourself? Expose yourself to the outdoors and feel yourself embraced by nature.
www.yogacafecanberra.blogpost.com
www.artofliferetreats.com
